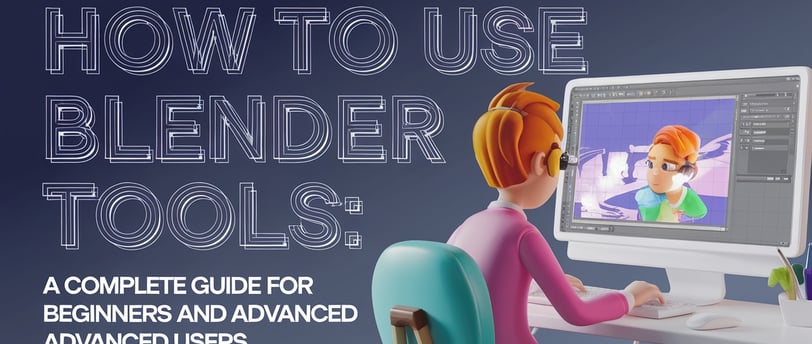
How to Use Blender Tools: A Complete Guide for Beginners and Advanced Users
Blender is one of the most powerful and versatile 3D creation tools
TECH & BUSINESS ENTERTAINMENT
12/14/20246 min read


Introduction
Blender is one of the most powerful and versatile 3D creation tools available today. Whether you're looking to model a simple object, create stunning animations, or dive into full-fledged game development, Blender has everything you need—all in one place. But as vast as its features are, Blender's tools can seem overwhelming at first. Fear not! In this guide, we'll walk you through how to use the essential Blender tools, offering practical tips, tricks, and answers to frequently asked questions to ensure your Blender journey is a smooth one.
By the end of this guide, you'll not only have a deeper understanding of Blender's capabilities but also gain the confidence to experiment and bring your creative ideas to life. Whether you're a hobbyist, aspiring animator, or experienced designer, G’s MCT Blog has the tips to help you make the most of Blender. Let’s dive in!
1. Getting Started with Blender: The Basics
Blender is known for its robust feature set, including modeling, sculpting, texturing, lighting, rigging, animating, and rendering. Before we delve into Blender’s specific tools, it’s essential to understand the basic layout of the software.
1.1. The Blender Interface When you first open Blender, the default interface can look a bit intimidating. However, it’s designed for maximum efficiency. Here’s a quick breakdown of the interface:
3D Viewport: This is where all the magic happens. It’s the workspace where you will create and manipulate your 3D objects.
Outliner: The outliner panel shows all the objects in your scene, making it easy to manage and select objects.
Properties Panel: This is where you’ll tweak the settings for materials, textures, lighting, and other properties of your scene.
Timeline: If you’re animating, this is where you’ll manage keyframes and animations.
Now that you have an idea of the layout, let’s dive into the tools Blender offers to create stunning visuals.
2. Key Blender Tools You’ll Use for 3D Modeling
Blender has a large set of tools, but some are absolutely essential for 3D modeling. These are the tools that will form the foundation of your creations.
2.1. Selection Tools
Blender offers a variety of selection methods to make it easier to select objects and elements in your scene. Some of the most important ones include:
Right-click Select: This is the default method for selecting objects in Blender. Just right-click on any object in your scene to select it.
Box Select (B): Use the B key to create a rectangular selection box. This is useful when you need to select multiple objects at once.
Lasso Select (C): Use C to select multiple elements by dragging a free-form shape around them.
Select All (A): Press A to select all objects or elements in the scene.
These selection tools help streamline your workflow, especially when working with large or complex scenes.
2.2. Transform Tools
Once you’ve selected your object, you’ll need to move, rotate, or scale it. This is where Blender’s transform tools come in handy.
Move (G): Press G to grab and move your object. You can constrain movement to specific axes by pressing X, Y, or Z after hitting G.
Rotate (R): Use the R key to rotate the selected object. Like with move, you can constrain rotation to specific axes.
Scale (S): Press S to scale an object. Scaling works similarly to moving and rotating, with the option to lock scaling to specific axes.
These basic tools allow you to manipulate objects in 3D space, making them vital for every aspect of 3D modeling.
2.3. Extrude (E)
Extrusion is a fundamental modeling technique in Blender. When you’re creating objects like buildings or characters, extrusion lets you extend the shape of an object in a new direction. To extrude, simply select a face on your 3D object and press E. Drag to extend the shape. You can constrain the extrusion to specific axes for more control.
3. Advanced Tools for Sculpting and Detailing
Once you have the basic shape of your model, you may want to add finer details. This is where Blender’s sculpting tools shine.
3.1. Sculpt Mode
Blender’s Sculpt Mode is similar to working with clay. It allows you to push, pull, and smooth out details on your mesh. To enter Sculpt Mode, select your object, switch to the Sculpting tab, and start sculpting. Some popular sculpting brushes include:
Draw: This brush lets you push or pull geometry to add depth.
Smooth: Use this brush to smooth out rough areas of your mesh.
Inflate: Inflate areas of your mesh to create volume.
Crease: Adds deep creases to your model, perfect for adding wrinkles or folds.
These brushes give you the flexibility to create highly detailed models, and sculpting in Blender is a fun and intuitive experience.
3.2. Dynamic Topology
Dynamic Topology is an advanced sculpting feature that allows you to add more detail to your model as you sculpt. This feature is helpful for high-resolution details, like skin textures or intricate surface designs. It automatically adds new polygons to areas of your mesh that need more detail, ensuring your model stays optimized.
4. Texturing and Shading Tools
After modeling comes texturing and shading. Blender provides a powerful suite of tools for creating realistic textures and applying them to your models.
4.1. UV Mapping
UV Mapping is the process of unwrapping a 3D model into a 2D plane so you can apply textures. In Blender, you can enter Edit Mode, select your object, and choose UV Unwrap to begin the mapping process. After unwrapping, you can apply 2D textures (such as images) to the UV map.
4.2. Materials and Shaders
Blender’s Shader Editor allows you to create complex materials for your 3D objects. Using the Principled BSDF shader, you can adjust parameters like:
Base Color: The basic color of your object.
Roughness: How shiny or matte the surface of your object is.
Metallic: Controls whether your object behaves like metal or not.
Specular: How much light reflects off the surface.
These settings give you total control over how your materials appear, and the ability to create highly realistic textures for any scene.
5. Animation Tools in Blender
Animation is one of Blender’s most powerful features. Whether you’re animating a character or a moving object, Blender has a vast array of tools to make the process easier.
5.1. Keyframes and the Timeline
The heart of animation in Blender lies in keyframes. Keyframes store specific poses or positions at certain times in your animation. To insert a keyframe, press I while in the 3D Viewport, then choose the property you want to animate (e.g., location, rotation, scale). You can see and adjust keyframes in the Timeline window.
5.2. Graph Editor
Blender’s Graph Editor allows you to fine-tune your animations. It displays the keyframes in a graph, making it easier to adjust timing and smooth out motion. You can manipulate the curves to create more natural animations and add extra polish to your projects.
6. Rendering Your Scene
Once you’ve completed your 3D model and animation, it’s time to render your work into a final image or animation.
6.1. Choosing a Renderer
Blender offers two primary render engines: Cycles and Eevee.
Cycles: This is Blender’s path-tracing render engine, ideal for high-quality, photorealistic renders. It’s perfect for final renders, but it can be slower.
Eevee: Eevee is a real-time renderer that’s incredibly fast and perfect for previewing animations or creating interactive content.
6.2. Render Settings
Once you’ve selected your renderer, adjust the render settings to match your needs. For high-quality renders, increase the sample rate, adjust lighting, and ensure that your materials are correctly set up. When you’re ready, press F12 to render your scene.
7. Common Questions and Answers
Q: How do I speed up rendering in Blender?
Use the Eevee render engine for faster results.
Reduce the sample rate in Cycles if photorealism isn’t crucial.
Optimize your scene by lowering unnecessary detail or removing unseen objects.
Q: Can I use Blender for 2D animation?
Yes! Blender includes Grease Pencil, a tool for creating 2D animations directly inside the 3D workspace.
Q: How can I learn Blender faster?
Start with basic tutorials and gradually increase the complexity of your projects.
Practice regularly, and don’t be afraid to experiment.
Join online communities like Blender Artists or the Blender subreddit to ask questions and get feedback.
Conclusion
Blender is an incredibly powerful tool that can help you bring your creative visions to life. From modeling and sculpting to texturing, animating, and rendering, Blender provides all the tools you need to create stunning 3D art. With this guide, we hope you feel more confident navigating Blender’s many tools and features.
Whether you’re a beginner or an experienced user, there’s always something new to discover in Blender. So dive in, experiment, and join the growing community of artists and creators who are making magic with this incredible software!
Be sure to visit G’s MCT Blog for more tutorials, tips, and updates on all things Blender and beyond.
Happy creating!
